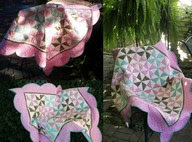
I decided to do a picture tutorial of my scissors fob. It is just a smaller version of the thimble holder on the right.
I call it a Brazil Nut Fob because it is shaped like that particular nut. I drew three arcs on a 2.75" circle cut out of a yogurt lid, then cut them out.
Next I cut out three more only slightly smaller, about 1/8" to 1/16" all the way around.
Then I traced around all six of them on the back side of two colors of fabric. The three larger ones in one fabric and the three smaller ones in another fabric, leaving room to cut them out with 1/4" added all the way around for a seam allowance. After cutting out all six pieces of fabric, run a row of running stitch around the middle of the seam allowance, then pull the stitching, gathering it up around the plastic piece--as you see in the first two pictures below. I ran a couple more rows of stitching around in the seam allowance before knotting the thread and cutting it off.
The third picture shows a small one and a larger one placed gathered edges together. Stitch the two pieces together for a unit.
For the first unit I add a twisted cord of floss on the end between the two before stitching them together. This will be the bottom piece of the fob. Stitch two more units like the third picture. Stitch the three units together (one to each side of the bottom unit) leaving the top edges unstitched.
(The middle picture shows how you stitch them together; I used a small ladder stitch.)
With the top edges not stitched together you can squeeze the ends together and it pops open for a small storage area.


I love this!! I have one that I bought some years ago, but I don't particularly like the fabric, so now I can make one that suits me better!! Thankyou for sharing this tutorial!!!!
ReplyDeleteFun project! You should do more tutorials. :)
ReplyDeleteVery clever! But what are the sizes of the larger one -is that the thimble holder? What is the purpose of this smaller one - what will it hold?
ReplyDelete